Today was such a nice and sunny day that all the Cherry Blossom trees I seen while driving around looked so pretty. I like this time of season when all the spring flowers start to bloom. My flower bed in the backyard of daffodils and tulips are blossoming.
I keep bugging my hubby to plant a cherry blossom tree but he doesn't want to since the flowers make a big mess when they fall. Makes a good point there since I don't want to be the one that cleans it up LOL. It's SO pretty though. I guess I'll settle for admiring cherry blossoms from afar like I did today. I took a picture of a tree today but it's not the greatest since it was taken from my phone. Hopefully we get another sunny day to take some real pics, but here's the beauty I saw today :o).
I totally forgot I had entered a giveaway at the blog site Rad Linc Crafts nearly a month ago since March was National Craft Month. The giveaway was for a book on how to create nylon flowers and a small kit to get me started.
I absolutely forgot that I even entered this giveaway and only remembered when I had seen a comment posted on my DIY Nail Polish post made be Fe at Rad Linc Crafts telling me that I won. Again, sorry Fe that I didn't get in touch with you any sooner.
I am so excited that I won since I've been wanting to try my hand in making nylon flowers since I've already made fabric ones already. I don't have a picture sample of my own to show you how a nylon flower looks like but you can check out one of Rad Linc Crafts' tutorials on "Making Nylon Flowers, Part 3: Making Plumerias" to get an idea.
In addition to checking out that tutorial, check out her entire blog. She's got other great craft tutorials and recipes as well.
I can't wait to receive my giveaway prize and start making some nylon flowers. I'll of course be sure to write up a blog when I do ;o).
After doing the weaving technique I wanted to try out other ideas, so I went back to YouTube to find other cool t-shirt cutting techniques.
The one idea that caught my eye was by Salinabear and she has several other tutorial vids that are just as cool. She did this really cool criss cross technique that intrigued me and I had never seen before. It looked a little complicated so I had to use an old t-shirt of my hubby's as a guinea pig before I even started on the actual shirt that I was interested in cutting up.
This technique requires you to cut tiny holes into the shirt for weaving the strips into. I ran into a little problem with that since I had a hard time finding where I actually cut the holes. I should actually clarify that the video tutorial says to cut tiny holes but I ended up just poking holes with my scissors instead since I wanted to make sure that when I weaved the strips through they would stay put and not fall out.
Anyway if you follow my technique of making holes, I HIGHLY recommend that you mark your holes with tailor's chalk on dark material or disappearing water soluble pen on light material. I ended up missing a hole when I practiced on my guinea pig shirt.
Here are some pics of my cutting process along with the actual tutorial vid.
Cut back into strips and stretch out.
Separate your strips to be tied in 4 different sections.
The final project.
I followed just the criss cross cutting technique and adjusted the shirt to fit me better since it's one of my hubby's old XL t-shirts. Here is the video tutorial by Salinabear and be sure to check out her other tutorials as well.
I wish I never gave away a bunch of old tees that I had so I could experiment with the cool art of t-shirt cutting. So for now I'm using my hubby's old tees for practice and just adjust them to fit me.
I started my hand in t-shirt cutting a few months ago when I wanted to match my son's Plex Halloween costume. I just the weaving technique on the back, cut out the neckline, and tied colored ribbon to scrunch up the sleeves. This turned out pretty good for my first time and this is how it turned out.
I later did more t-shirt cutting for myself, a friend, and her daughter using the same technique when we went to a Yo Gabba Gabba concert. I didn't have enough time to experiment with different styles so I just did the same weaving technique. I ended up weaving the back of my t-shirt three times since it was too loose. Here's how our t-shirts turned out.
Danni's Tee
Suelynne's Tee
My Tee
I'd give you the rundown tutorial but I'd totally screw up on writing it correctly. So rather than confuse the heck out of you here's the YouTube video by MakeupByRisa that I used to get the idea of just the weaving technique. Everything else I did to my tee was just by going with the flow on how to make it cute.
Hope you try this out and you rock some cool tees!
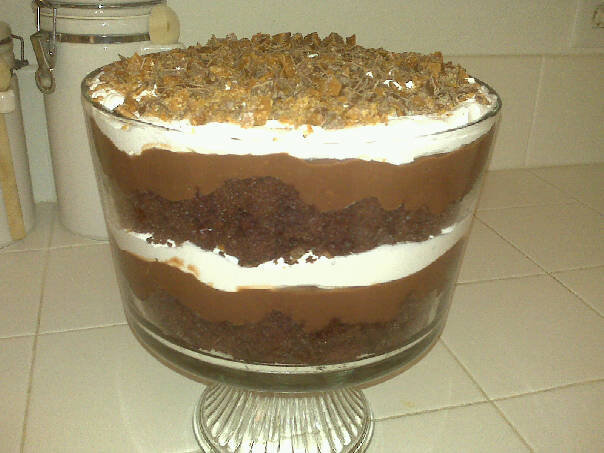
However you want to call it. I've only known this dessert to be called Trifle when I first learned how to make this over 15 years ago in high school. It's so indulgently yummy and chocolaty I can see why it can be called "Sex in a Pan" or an "Orgasm Cake" since it's better than sex or so I've been told LOL.
It's really easy to make and I usually layer this dessert neatly into a glass trifle dish bowl. However, since I made this last night to take over to a BBQ I just used a plain ol' aluminum pan and made one layer of each ingredient.
Here's the how to:
CHOCOLATE TRIFLE
Ingredients:
1 box of devil's food cake mix
1 box of chocolate instant pudding (I used the bigger one, not sure what the size is exactly)
1 big tub of Cool Whip
4 Skor candy bars
Directions:
Bake cake according to box directions. Prepare pudding according to package directions. Let Cool Whip thaw out while cake is baking. Chop up Skor candy bar into small pieces. Once the cake is done baking and cooled down, crumble into a layer in a trifle bowl. Layer with half of chocolate pudding, half of Cool Whip, and candy. Repeat layer one more time with remaining ingredients.
This is how it would look like in a trifle bowl and one layered in an aluminum pan.
I have been wanting to make Cake Balls for forever but never had a reason to make them. Like I really had an excurse not to anyway, they're some kind of dessert! If you're not familiar on what Cake Balls are, they're essentially chocolate covered cake balls kind of like a truffle.
I've been following the site Bakerella that showcases the Cake Balls along with other yummy looking treats. She provides the how-to's to duplicate her yummy creations and they look pretty easy. So since my son's third birthday is coming up I was thinking of making these cake balls as treats for the young ones but more so for the adults.
I followed Bakerella's recipe for the Red Velvet Cake Ball's and here's my process on how they turned out.
Ready to bake the cake.
Cake is done baking.
Crumble the cake.
Add a can of whipped creamcheese frosting.
Mix the frosting into the crumbled cake.
Shape into about 1.25 inch balls.
Melt chocolate. Here I used an electric candy melter/warmer.
Melted chocolate ready in about 5 minutes.
Dip a cake ball into chocolate, tapping off any excess.
Lay on a cookie sheet lined with wax paper. Allow chocolate to harden.