Sunday, January 12, 2014

Portuguese Bean Soup


Portuguese Bean Soup isn't something I make too often. One of the key ingredients for this soup calls for some Portuguese sausage which can be found here in Oregon but is very expensive.

We have a stash of frozen Portuguese sausage in our freezer that we brought home from Hawaii on one of last trips and some from when our in laws visited. Although we have a stash we only bring it out to eat on occasion since we try to make that stash last until the next trip home.

I was craving for some Portuguese Bean Soup and what perfect time to have it since it started getting cold and rainy again. I don't follow an actual recipe since this is something I believe my mom taught me when I was a teenager. So this "recipe" below is basically what I normally use and how I make it. There are other recipes that call for macaroni and/or cabbage, but I never put any of that in my soup. 

For those that don't have access to local Hawaii Portuguese sausage you could possibly use smoked sausage or I've seen Mexican linguica in the grocery store as a substitute. Also, to those new to following me I tend to overcook a lot since I grew up learning to cook for a big family. I never make a small batch and it's always in a big stockpot. So you might have to adjust the recipe a bit unless you want to being this as leftovers for a few days ;p. 

PORTUGUESE BEAN SOUP

Ingredients: 
4-6 smoked ham hocks (I used smoked pork shanks this last time since it was actually cheaper and has a lot more meat)
1 stick Portuguese sausage, diced 
2 pkgs. diced ham
2-3 large potatoes cut into small cubes
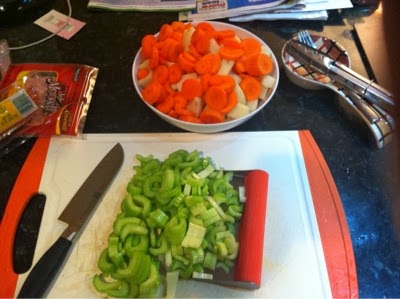
2-3 large carrots peeled and sliced 
3-4 celery stalks sliced 
1 medium onion diced
4 small cans tomato sauce 
1-2 cans red kidney beans, undrained
Salt & pepper to taste 

Directions:
Boil ham hocks in a stock pot with enough water to cover it. Keep boiling hock meat and adding water until you're able to pierce a fork through the meaty part with ease. Let cool. 

*DO NOT DRAIN OR GET RID OF THE WATER USED FOR BOILING, THAT IS WHERE MAJORITY OF THE SOUP FLAVOR IS. IT'S YOUR SOUP STOCK!*

Remove meat from hock bone and chop up into smaller pieces. Heat up soup stock, add hock meat & bones and remaining ingredients. Boil over medium heat till veggies are cooked through. Add salt and pepper to taste. 

Hope you like this as much as my family and I do. Enjoy!

xoxo,
Adriana


Wednesday, January 8, 2014

80's Style NYE Party

This past NYE we hosted an 80's themed party and dressing up the part was required. Everyone's costume could be anything 80's related so sky was the limit and this would fare for a fun and interesting evening. Since everyone would be coming in costume we decided to also set up a photo booth with a few props.

For our family of four it was pretty easy to decide on what we would wear except for my hubby who kept changing his mind on his costume. With the holiday season being so busy we didn't have enough time to get too elaborate on our costumes and I wanted to use things that we already have or could find easily at the Goodwill or elsewhere for cheap.

Our two boys were totally easy to dress up, they ended up being Run DMC. All they needed were a pair of black track pants, black shirts, fedora hats, and gold necklaces.  Real simple! The lil kid already had a hand me down Run DMC t-shirt from his big brother, so that was perfect.  I also was actually able to find the lil kid a black Adidas track jacket at the Goodwill for $3.99 :) and fedora hats from The Dollar Tree.  For the gold necklaces they just wore some gold beaded NYE necklaces that I got for party props.


For myself I pretty much had an idea on what I was going to wear but the decision on how to coordinate the outfit was the more daunting task.  After searching on Pinterest and googling ideas I got set on some kind of Jazzercise'ish/Let's Get Physical outfit. When I found the lil kid's jacket at Goodwill, I also found for myself a pair of bright pink and black jogging shorts that were still brand new with tags on salvaged item from Target for $3.99. I already had on hand at home a pair of black tights, an old t-shirt that I cut up, and a white tube top.  All I needed to complete my outfit was a pair of leg warmers and gloves. I didn't realize how expensive those things were! I knew there had to be a way to DIY it myself on the cheap. 

I remember on Pinterest that leg warmers would be easy to make by using the sleeves of old sweaters. So I went back to Goodwill to hunt for some cheap sweaters on color tagged special but that was a bust until I saw something at the end of the aisle.  There were pairs of cheap colorful socks and I also remembered on Pinterest seeing how to make baby legs from socks...also a friend of mine has done so herself. I examined the socks and figured that they were stretchy and long enough for me so I could experiment. 


 Based on tutorials when making baby legs you'd have to cut right where the heel part is and that would be a perfect length for a baby after sewing up a seam. However, I needed that extra material to fit for an adult. So I just snipped off the toe area and sewed a seam. Then since the heel part tuckered out, I snipped a little bit off so it was sticking out so much and sewed the hole right back up.  Then there you have it a pair of cheap DIY adult leg warmers ;).

Now for my gloves I found a similar matching in color pair of socks at the dollar store. I snipped a little bit of the toe part off, sewn a seam, and sewn finger holes. Since I was pressed for time I just snipped a little hole for the thumb parts and put some anti fraying liquid to keep it from unraveling. Threw on my outfit, did a half up pony tail to the side with a cotton headband I used as a "scrunchie", slapped on some makeup, and used some of the NYE beaded necklaces.  Outfit complete!


Now for my hubby he kept going back and forth on his outfit.  He had the bright idea for us to go as American Gladiators or as Prince and Apollonia in the movie Purple Rain.  If we had time I so could make that happen but there was no way I'd be able to pull that off in the few days had to prepare.  Then I came up with the idea of him going as Bob Ross from that PBS painting show, he had the outfit all he needed was to borrow an Afro wig. Another option was to go as Tom Cruise in Risky Business, but hubby doesn't own tighty whities and I wasn't about to go buy a pack just for the party.  Then I came up with the wonderful idea of him going as Cheech from the movie Up in Smoke ^_^!

I didn't have the yellow tank top/tee, red beanie, or red suspenders so I had to improvise a little.  I could've sworn that my hubby had a black vest but it must've gotten lost in our moving shuffle from the year before. So I ended up doing a DIY vest of my own instead.  I had an old black t-shirt and just  cut off the sleeves and shaped the front to look like a vest. Since I was making photo booth props that consisted of mustaches there was one perfect to be a Cheech mustache. I traced the handle bar mustache onto some black felt and added double sided tape for hubby to wear. Then hubby threw on a pair of khaki pants, a white ribbed tank top, the DIY vest, the mustache, and a black beanie. Hubby normally shaves his head so he was supposed to wear my old mullet wig under his beanie but he opted out from doing so. It wasn't necessary since his costume was still easily identifiable even if I didn't have time to DIY a huge fake "joint" ;)-.


We had Bruce Springsteen, Ghostbusters, Marty McFly, a few more 80's exercisers, Sloth from The Goonies, Mr. T, 80's teeny boppers, Madonna,and Punky Brewster join the party.  The night was filled with lots of food even if it was just a pupu potluck, laughs, and fun with the photobooth. When it was time to countdown to the new year, we all gathered outside and did four countdowns since we kept going by people's different clocks times. LOL! Nonetheless, we Chee Huu'd a few times and rang in the new year with everyone.


The party turned out to be a success and a few of us talked about doing another themed party in a few months. I think we settled on a superhero theme for the next one and I've already got ideas for our family costumes. I'm already thinking up ideas on how to improve the backdrop for the next photo booth.

HAPPY NEW YEAR 2014 EVERYONE!

xoxo,
Adriana


Wednesday, January 1, 2014

Happy New Year...2014 Here We Go!

Happy New Year 2014 to everyone!

Dusting off this blog once again. I'm so terrible trying to keep this thing going. I can blame all the everyday life craziness that gets in the way of being active on here. So with that said here are just a few  resolutions that I want to improve on within this year. 

1. Blog at least 1x a week.

2. The usual weight loss goal. I did so good last year that I'm able to wear sizes that I haven't seen in almost 14 years. Just got so "lazy" in the last few months that I NEED to get back on it. 

3. Learn how to use our DSLR camera better. I rely on my hubby too much to take the pictures with it. I know some functions but not to it's full potential. 

4. With said above, take more pictures of the boys. We've encountered the "second child syndrome" and don't nearly have as much pictures of our second son as we do our oldest son. I want to be able to pick up the real camera more and not rely on using my phone as much.

5. We've lived in our new home for a little over a year. It's time that I really start tackling and getting this house more organized. There are things still in boxes that haven't found a permanent spot. This where my organizational Pinterest fantasies hopefully can come true >_<. 

6. In addition to the above, I need to start decorating our home more. Bare walls galore! Got all the picture frame & art work supplies sitting there, just have to make my other Pinterest decorating fantasies come to life here too. 

These are what have been lingering on my mind on what I want to try to improve on. Now let's see which of these six will be will make it till the end of the year. 

Here's to the next 365 days of 2014!

Tuesday, March 5, 2013

Knockoff Olive Garden Zuppa Toscana in the Crockpot

I honestly never had Zuppa Toscana until a few months ago when a friend's girlfriend brought some to a New Year's Eve party. Of course in Oregon is cold and wet for at least half the year or so, so eating this lovely warm soup with some soft French bread really hit the spot. It was so yummy that I had to go find a recipe for it.

Little did I know being the Pinterest addict that I am, I had already pinned this recipe months ago. Ha! Well I found two ways to make Zuppa Toscana, over the stove and in the crockpot. I opted to try the crockpot method and followed this recipe from 365 Days of Slowcooking and did some changes of my own. I'll note what I did differently with the recipe ingredients/directions.

This turned out SO yummy that I can't wait to make it again and I got the approval from the hubby and lil booger. I'll probably try the stovetop method the next time and see if there is a difference but I think it'll turn up the same results.

Enjoy this recipe as did I...HAPPY EATING!

CROCKPOT ZUPPA TOSCANA

Ingredients:
1 lb bulk Italian sausage, browned and drained (I used 2lbs of sausage instead)
2 cans chicken broth
1 cup water
1/4 cup onion, chopped
3 large russet potatoes, cubed
1 garlic clove, minced
Bacon bits (I chopped up & browned one package of bacon instead. Who doesn't love bacon anyway)
1 cup whipping cream
Kale, chopped

Place Italian sausage, chicken broth, garlic, potatoes and onion in slow cooker. Cover and cook on HIGH for 3-4 hours until potatoes are cooked and soft. Add desired amount of bacon bits, whipping cream and cut up kale right before serving. Top with your choice of cheese; serve with fresh bread. Makes 8 servings.


Tuesday, January 8, 2013

Hey Hey...

Wassup stranger?! I know I've taken another hiatus since I last posted way back in September. YIKES!

Most of you in my Facebook world know the one BIG reason for that added with the lil booger going to preschool, hubby coaching football, and then the holidays rolled on in soon after. I've been though pretty active in using the Instagram app and posting all kinds of pictures especially recipes I've found off of Pinterest that turned out well.

I will get back into posting recipes when I survive through the lil manapua's first birthday party we're planning. Which by the way I hope to take enough pictures of since I'm doing a whole lot of DIY decor and such.

However, I just may be able to squeeze in a recipe or two in the meantime. Just be on the lookout ;o).


Wednesday, September 5, 2012

Today Marked A...

BIG day for us.

The lil booger started his first day of PRESCHOOL!!

He already had his orientation two weeks ago, met his teacher, and saw his classroom. We've been going through certain rules at home that he should follow such as raising his hand when he needs to ask a question, no sucking his thumb (trying to break him out of this habit), no putting his hands in other peoples faces, and most of all if he has to fart go to the bathroom to name a few.

On the way to school I drill him on the rules again and he tells me that he doesn't want me to leave him with such sadness in his voice that made me tear up a bit :o(. Mind you that he only goes to school for two and a half hours M-F, he's only gone for pretty much the same length of time I put him into the daycare room at the gym.

Guess its the realization that he's really growing up and "on his own" after being home with me for the past four years. *SIGH* Once we got to school though he got excited and couldn't wait to get out of the car. We were a bit early and the doors were still locked, but that didn't stop him from pressing his face against the glass door to take a peek inside.

Once inside he quickly hung up his backpack, found his name tag, and went straight to the train set he played with the other week. He paid no attention to me and wasn't interested in giving me a hug and kiss goodbye. :o(. That did kind of disappoint me a bit, but I let him on his way.

My not so lil booger is growing up, next thing you'll know he's off to college studying to be a "dinosaur doctor".

Friday, August 31, 2012

Frugal Friday: Homemade Foaming Hand Soap

Who here loves Bath & Body Works Foaming Hand Soap in their yummy smelling scents?

*Ohh Ohh raises both hands here!!*

They get quite spendy even if you buy them on sale. I had no qualms before to snatch those babies up during a sale to stock up when I used to work and make my own money. Now that we've been a single income family for the past four years or so getting those BBW soaps were a once a great blue moon buy. Then I started to use generic Target foaming hand soap to refill the BBW bottles until I of course discovered Pinterest.

I stumbled upon several pins on how to make your own foaming hand soap. I honestly cannot tell you who I saw the pin from since it's been months since I first tried this out, but if you searched DIY foaming hand soap several pins will come up.

The one I found though simply just used an inch of baby washing soap and filled the rest of the bottle with water. You should actually leave about half an inch or so from the top of the bottle since when you put the pump back in it will overflow, then just tip side to side and up and down (DON'T SHAKE) to mix.

I had some baby washing soap from my baby shower that I ended not being able to use since the baby was "lucky" to have sensitive skin like me. So rather than waste those bottles of baby wash I put them to use and been using them for our hand soap.

It's been working great for us and in the end is a really cheap way to refill those foaming hand soap bottles. I think when I would buy the generic big bottle refills which ran about $4 and would only refill at the most four empty foaming dispensers. One 15 fluid ounce bottle of baby wash that cost about $4 as well has so far refilled my kitchen and downstairs bathroom dispensers at least a dozen plus times so far and there's still a little over 1/4 left in the baby wash bottle.

I'll be doing this for a long while now and you can even use the other scented baby washes. I had the lavender scented one as well and used that for the upstairs bathroom. My hands almost smells as good as a baby's freshly bathed bottom haha.

I hope that you try this out as well since I highly recommend it. So that's my frugal tip for Frugal Friday.

Everyone enjoy this Aloha Friday and long weekend!