Wednesday, February 28, 2018

Don't Mind the Mess


I've neglected this blog and I'm finally making some time to reorganize all postings with links and folders. I had debated on just creating a whole new website but that would take too much time at the moment. So I figure it's better to just organize the posts for now until I figure out what I want to do the in the future.

Thanks!

Tuesday, February 27, 2018

Instant Pot Beef Curry Stew

I can't believe that I never posted an Instant Pot recipe or video of me making Japanese Beef Curry Stew. I first started making this when I got my IP two and a half years ago and it's WAY better in the IP.  It only takes 25 minutes IP cooking time and the meat is so tender.  There's no need to let it simmer for hours to get the meat soft. A few years back I previously posted the stove top version of this recipe and I'm happy to say that I now have an IP version.  Ingredients are all the same, just with a few minor adjustments for the IP conversion.


INSTANT POT JAPANESE BEEF CURRY STEW

INGREDIENTS:

2-3 lbs. chuck roast, cut into cubes
2 tbsp. garlic, minced
2 cups baby carrots
1 cup celery, chopped
2 large russet potatoes, cut into large cubes
1/2 onion, diced
4 cups water
1 large or 2 small pkgs. S&B curry sauce 
oil

DIRECTIONS:
Turn IP on to saute and add about 2 tbsp. of oil.  Add stew meat and brown for about 5 minutes. Add onions and celery and stir. Add carrots, potatoes, and water.  Cover with lid. Hit meat/stew button and adjust timer to 25 minutes. Be sure pressure valve is at sealing.  When timer is over, let NPR for 10 minutes and then QR.  If liquid starts to leak out of valve, just slowly release the valve to let the pressure release slowly. Once pressure pin drops, open lid and gently stir the pot. Turn off IP and turn on to saute. Let come to boil and add curry blocks. Gently stir until curry blocks are dissolved. 

Serve over hot rice and enjoy!


Thursday, August 10, 2017

Instant Pot Lechon Kawali

     I'm so happy I've finally made the attempt to make on of my favorite Filipino comfort foods in the Instant Pot which was Lechon  Kawali. I've made this several times in the oven but with its high fat content and with the high oven temperature, it would smoke out my kitchen. Plus it took a while for it to cook too. So since I've been slowly trying to convert nearly everything I cook via stove top or oven,   I knew there had to be a way to at least prep cook the pork belly and finish off with broiling the top layer of fat.

     My local Costco sells pork belly cut into about 2-inch or so thick slices. I normally use his cut of meat to marinate in a char siu sauce and layer grill on the BBQ. I finally had a very late epiphany to try to make Lechon Kawali with it and finally did so a few days ago. I just seasoned each pork slice with black pepper and garlic salt, added 1 cup of water to the IP liner, and set the cooking time for 20 minutes. Once done I sliced each pork piece and baked for 10 minutes. Set oven to broil and broiled each side for about 7 minutes each time. Everything worked in my favor and it turned out SO delicious! 

     I maybe could have broiled it a little more longer but I got impatience and hungry 😝. Next time I make this though, I'm going to try the baking and broiling without slicing up the pork beforehand. I'll just leave it in whole slices so I can get the top layer of fat more crispier. 

     After the Lechon was done cooking, I turned it into a specialty dish well known at a local Filipino restaurant in Hawaii (Thelma's of Waipahu) called the Thelma's Special. Which is pretty much lechon with chipped yellow onions, chopped tomatoes, and seasoned with shoyu and apple cider vinegar. I got my Waipahu raised hubby's seal of approval and said it's nearly like the real thing 😄. So for your eating pleasure here is the recipe.


INSTANT POT LECHON KAWALI & "THELMA'S SPECIAL"

INGREDIENTS:

4 lbs boneless pork belly 
Black pepper 
Garlic salt
1 cup water

DIRECTIONS:

Season all sides of pork belly with black pepper and garlic salt. Add water to instant pot liner. Add pork slices to liner. Cover with lid and set timer to manual for 20 minutes. Be sure valve is at sealing. When timer is done, let NPR 10 minutes and then QPR. Heat oven to bake at 400 degrees. Remove pork from IP. Slice pork into 1-inch pieces and place onto wire rack on a baking sheet. Bake for 10 minutes. When done, change oven temperature to broil. Broil one side of pork for about 7 minutes or until you see it crisping over enough...just keep your eye on it. Remove from oven and flip pork pieces to opposite side and broil the other side to repeat process. Once done remove from oven and let cool. Serve with lechon sauce or use pork to make your very own "Thelma's Special".


"THELMA'S SPECIAL"

INGREDIENTS:

2-3 ripe tomatoes, chopped
1/2 yellow onion, diced
1/2 cup shoyu
1/2 cup apple cider vinegar

DIRECTIONS:

Place cooked lechon in bowl. Add tomatoes and onions. Mix shoyu and vinegar. Pour about half of mixture over pork and vegetables. Add more to taste. Then ENJOY!


Monday, July 24, 2017

Instant Pot: Roast Pork

I converted my oven baked roast pork a while ago but never took the time to post the recipe.  The original baked recipe can be found here: http://anchetaandco.blogspot.com/2010/11/september-2010-meal-15-roast-pork.html

As I'm sitting here drafting this post, I realize it's pretty much the same way as my IP kalua pig is made but with different seasonings. All you need to do is just add some pork gravy, rice, and corn (Mac salad  preferred 😉) and you've got your own local style plate lunch. My hubby even compared it to an Ige's plate lunch but I won't be tooting my horn just yet 😆. Here's the recipe for you to see if it's plate lunch worthy 😉.

INSTANT POT: ROAST PORK

4-5 lbs pork butt or shoulder (cut into 2-inch thickness)
Coconut oil or preference
2 tbsp minced garlic
1/2 medium chopped white onion
Garlic salt
Black pepper
1 cup chicken broth
4 packets pork gravy, prepare to directions
Cornstarch
Water

Directions:
Turn IP on to sauté and add oil. Add onions and cook until semi soft. Add pork and season with garlic  salt and pepper. Add minced garlic and chicken broth. Place cover on IP, cancel sauté, hit meat button, and set timer to 35 min. Be sure valve is on sealing. While pork is cooking, prepare gravy to package directions and set aside. When timer on IP is up, let NPR for 10 minutes then QR. Remove lid and remove pork to a separate clean bowl and shred into big chunks.  Hit cancel on IP and turn sauté on. Add prepared pork gravy to pot and let come to boil. Mix a slurry of cornstarch and water. Add to gravy mixture and let thicken. Once thickened, add pork back into pot. Serve with rice and preferred side dish. All I had was corn although mac salad would've been preferred 😉😝.


Thursday, January 12, 2017

Handmade Valentine's Coloring Card

So Valentine's Day is nearly a month away. I just made some of these for the boys' school treats next month. I'm considering on selling these (LOCAL TO ME ONLY). I figure it can save you the time from searching for treats at the store. Bonus is that I'll do the work for you 😉. 

Selling 24 for $18. You get to choose up to 3 designs. They will include the crayons and treat bags with an adhesive seal. For an additional $2 charge I can also include the names for the "To" and "From" with a name list that you will provide to me. 

Lmk, if you're interested! Mahalo!


Thursday, December 8, 2016

Instant Pot: Chicken Papaya

We've been experiencing 35*+ weather lately. Even got some snow today and expecting freezing rain overnight. Made chicken papaya for dinner last night and it was such comfort food for this weather. 

Instant Pot: Chicken Papaya

Ingredients:
3 lbs defrosted chicken wings
1 large green papaya, peeled, seeds removed, and cut into 1-2 inch cubes
2 medium chopped tomatoes 
1/2 onions sliced
1-2 tbsp minced garlic
2 tbsp patis, more can be added to taste
2 cups water
Shoyu to taste
Black pepper
Coconut oil

Directions:
Hit sauté. Add some coconut oil, onions, and garlic and cook 1-2 min. Add tomatoes and store 1-2 min. Add chicken wings, water, and patis. Stir. Close lid and move valve to sealing. Cancel sauté and hit chicken option. Adjust time to 5 minutes. Let NPR for 10 minutes and then QPR. Add papaya and stir. Reclose lid and change valve to sealing. Cancel keep warm and hit soup option. Adjust time to 2 minutes. Let NPR 10 min and then QPR. Add black pepper, shoyu, and more patis to taste. Enjoy!

**I wasn't sure about cooking the papaya at the time time with the chicken for fear of turning it into mush. After I did the second round of cooking I kind of overlooked the wings and the papaya was perfect but still al dente. I could very well cooked everything all at once for 5 minutes and it would've turned out fine. I have one more green papaya left, maybe I'll make another batch of soup to test that theory 😝.


Sunday, December 4, 2016

Instant Pot: Zuppa Toscana

I first made this a long while ago in the crockpot and then stovetop. I've actually never eaten this soup before at Olive Garden but a friend brought for a party and it was such comfort food. Now that I have an Instant Pot I of course had to make this soup in it. It only took about 10 minutes prepping time to cut the veggies and bacon. Then 5 minutes to cook on the soup function, NPR (natural pressure release), and then to QR (quick release). Super quick dinner to make and it tasted just as good if not better than when done in the crockpot and stove top. Here's the recipe.

Instant Pot: Zuppa Toscana (Olive Garden Knockoff)

Ingredients:
1 lb Italian sausage
3 russet potatoes, cubed
1/2 onion, diced
2 tbsp minced garlic 
1 pkg bacon (I used 2 pkgs, well because bacon 😝)
1 bunch kale, removed from stem and chopped
4 cups chicken broth (forgot to include in first pic and in the 4th pic it looks like gel because I used turkey broth I made in the IP a few days ago)
1 1/2 cups heavy whipping cream 

Directions:
Sauté Italian sausage till no longer pink. Add onions and garlic and cook for 1-2 minutes. Add potatoes and broth. Hit cancel, cover with lid, hit soup, and adjust time to 5 minutes. Make sure valve is on sealing. While IP is going, I separately brown bacon and drain fat. Let NPR for 10 min, then QPR. Cancel keep warm button and hit sauté. Add heavy whipping cream, chopped kale, and bacon. Season with black pepper. Enjoy!


Wednesday, August 3, 2016

Instant Pot Kalua Pig


I keep forgetting to post about this and it's been sitting in my pending posts. Plus I got kinda lazy with blog posting and on the Facebook IP group. I ended up making this last night and figured I get it rolling again 😉. Bonus, I included a little vid with some island flavah 😆. 

Our normal 2 hour oven baked Kalua pig cooked in the IP for 25 minutes. Overall cooking time of prepping, quick sauté, pressurizing, and depressurizing in about 45 minutes. SAY WHAT 😳😃😱😉👍🏼! 

I just did what we normally do for our oven baked version and adjusted the measurements for the seasonings a bit. Just to account for the saltiness. You can always season more after cooking but during the cooking process you're pretty much outta luck. 

We've always cut our pork butt or shoulder into about 1 1/2-inch slices, laid into a 13"x9" baking pan, seasoned it with shoyu, Hawaiian salt, & liquid smoke (I've made this so many times that I don't even measure but will give an approximate), added some water, covered with foil, and baked at 400* for two hours. The slicing of the pork makes it cook faster and makes for easier shredding. 

Now today I converted that method to the IP and it worked like a charm. I kept going over other recipes for Kalua pig but just couldn't shake that it takes just as long in the IP as it does when I cook in the oven. Then my hubby told me why fix something that isn't broke and just do it the same oven way (ingredients wise) but cut the time for the IP. So I did and it went a little something like this...

PS - Thank goodness it worked as a trial run since I just scored 5 pork butts on a price cut for our son's bday party the next weekend. Used one of those for this experiment 😃😉👍🏼.


KALUA PIG

INGREDIENTS:

3 1/2 lb - 4lb boneless port butt or shoulder (if you have bone-in, it's fine. Just slice and cut around bone) sliced into 1 1/2-inch slices. 
Liquid smoke
Hawaiian salt
Shoyu
Water
Coconut oil or preference. 

DIRECTIONS:

Slice pork into about 1 1/2 inch slices.  Hit sauté, add some oil, and brown slices a little on both sides. Cancel sauté. Sprinkle about 1 tbsp. Hawaiian salt.  Drizzle about 1/4 cup shoyu over pork.  Drizzle about 2 tbsp liquid smoke over pork.  Add 1 cup water.  Cover with lid and be sure valve is at sealing. Hit meat and adjust time to 25 minutes. When done let NPR for 10!minutes, then QR.  Remove lid and remove pork pieces from liquid to separate bowl for shedding. Reserve liquid if you want to keep meat less dry or use as broth for Kalua pig and cabbage. 

\000/

Wednesday, April 6, 2016

Instant Pot Beef Luau Stew

I've had success with slowly converting all the local Hawaii dishes that I cook via stovetop to the Instant Pot. A few weeks ago I conquered a beef luau stew. It's Hawaiian beef stew made with luau leaves (taro leaves) and coconut milk. Normally this takes me a few hours to cook on the stove in order to get the meat tender and to cook the fresh leaves properly. Not cooking down the leaves properly results with you experiencing an itchy throat when eating it. Here's my mock up recipe that I just typed up 😉👍🏼. 

INGREDIENTS:

Luau leaves (taro leaves) stems & fibrous veins removed
8 cups water
Hawaiian salt
3 lb chuck roast 
1/2 onion
2 tbsp minced garlic
4 cups chicken broth 
2 cans coconut milk
Salt & pepper to taste 

DIRECTIONS:

PART I:

Cleaned and cut off stems of luau leaves. Chop leaves and add to pot with 8 cups water. Sprinkle some Hawaiian salt and push leaves into water. Cook on manual for 15 min. Let NPR for 10, then quick release. Drain leaves.  I ended up doing two cooking batches of the leaves since I didn't want to overflow the pot. 

PART 2:
Cut chuck roast into big chunks. Sauté meat with coconut oil. Add sliced onions, garlic, 4 cups chicken broth, and cooked luau leaves. Stir to incorporate. Cancel sauté and cook on Meat/Stew for 25 min. Let NPR for 10 min, then quick release. Cancel keep warm and hit sauté. Add two cans of coconut milk and stir.  Season to taste. Enjoy!


Monday, April 4, 2016

Instant Pot Pork & Tabungao (Opo Squash)

I make this Filipino dish all the time over the stove. It's such comfort food for us and we like it soup like. When a make the Filipino Port Guisantes (Pork & Peas) a few weeks back in the Instant Pot, I knew I could do the same with this dish too. This too took only seven minutes cooking time (after pressurizing) in the IP when it normally takes about an hour total over the stovetop. 

Here's the recipe!

Instant Pot Pork & Tabungao (Opo Squash)

3 lbs chopped pork butt or shoulder
1/2 onion sliced
2 tbsp minced garlic
2 ripe tomatoes, chopped
2 medium sized tabungao (Opo squash), peeled and sliced
1/4 cup patis (fish sauce), 
1 cup chicken broth
2 cups chichiron (fried pork rinds), optional
1 cup dried shrimp, optional 
Black pepper to season 
Oil

Directions:
Sauté pork, onion, garlic, and oil in the Instant Pot for about 5 minutes. Cancel sauté. Add chicken broth, patis, and squash. Mix well. Seal lid and be sure valve is on sealing. Hit meat button and adjust time to 7 minutes. When done let it NPR (normal pressure release) for 10 minutes, then do a QR (quick release) of the valve. Remove lid, turn off IP, and hit sauté. Add tomatoes, dried shrimp, chichiron, and black pepper. Mix well and let cook till last remaining ingredients are soft. Taste broth and add more patis if needed to your preference. 

MANGAN TAYON!


Tuesday, March 8, 2016

Instant Pot Shoyu Chicken

About a month ago my brother came in from Seattle for a visit be had been curious on how my Instant Pot works since I had been posting about it on Facebook. He was pretty amazed that I could cook a local Hawaii favorite is Shoyu Chicken in less than half the time over the stove. This batch I made in the IP took only 8 minutes since it was a mixture of bone in chicken thighs and drumsticks. I had thought I had grabbed a tray of all bone in thighs at the store but this worked out really well. I later cooked a tray of all bone in thighs for a different dish and found I had to cook it in the IP for 12 minutes. 

So depending on what cut of chicken you are using, you will have to adjust the cooking time. This recipe will be based on what I have done so far. 

Here's the recipe. 


INSTANT POT SHOYU CHICKEN

Ingredients:
1 tray of chicken thighs and drumsticks
1 cup shoyu (Aloha Brand preferred)
1 cup water
1/2 cup brown sugar, packed
Few slices of ginger 
Coconut oil or preference
Chopped green onion
Cornstarch and water for slurry


Directions:

Sautéed chicken thighs and drumsticks in coconut oil and set aside. Deglazed the bits with water, shoyu, added sliced ginger, and brown sugar. Added the chicken, cancel sauté, and hit chicken for 8 minutes. NPR 8 minutes and then QR. I removed chicken, hit sauté to thicken sauce with cornstarch and water and added chopped green onion. Placed chicken back to pot. Enjoy!


Friday, March 4, 2016

Instant Pot Pork Adobo


Made another favorite Filipino dish in the IP the other night called Pork Adobo. Which is pork simmered in vinegar, soy sauce, and garlic. It turned out so yummy! Yummier than when I cook it over the stove top. My own adapted recipe as follows:


INGREDIENTS:
3-4 lb. pork butt or shoulder cut into large cubes
1 cup soy sauce 
1/3 cup apple cider vinegar
1-2 tbsp minced garlic
3-4 bay leaves 
1 tsp black pepper
1 tsp oregano (optional, hubby just likes to add this) 
Coconut oil or your preference

DIRECTIONS: 
Sauté pork with some oil for about 5 minutes. Add remainder of ingredients and mix. Cancel sauté and hit meat adjust time to 25 minutes. Be sure valve is at sealing. Let NPR for 10 minutes and then QR. Serve over hot rice. Enjoy!

**I failed to mention that since I did use a pork butt that was kinda fatty, there was lots of oil after it was done. I just used a slotted spoon to drain the fat upon eating. When I stored the leftovers overnight, I just scraped out the solidified fat in the morning and it was less oily.**

Instant Pot Pork and Peas

Ever since I got my new Instant Pot, I've been on a mission to convert local favorites done over the stovetop. So far they have been a success and it's allowing me to get the wheels turning in my head on how to adapt to the IP. 

I can't tell you how much faster it takes to cook and about the tenderness of the meat in the IP. The faster cooking time is what really helps me when we're shuffling in between multiple activities for the family. 

Sometime last week I managed to cook Filipino pork and peas (guisantes) in the IP. This turned out as another keeper in the IP rotation menu. Here is the recipe as follows. 


PORK AND PEAS (GUISANTES)

Another stove top to IP conversion a success! I made a Filipino dish called Pork Guisantes (Pork and Peas) which is pork in a tomato base sauce with frozen peas and pimientos. I just winged it based on my recent IP practice cooking and it went a little something like this...

Ingredients:
2 lbs chopped pork (I used pork shoulder)
1 can chicken broth
1/2 onion chopped
2 tbsp minced garlic 
1-12oz can tomato paste 
1 bag frozen sweet peas
2 small jars diced pimientos
1/3 cup Patis (fish sauce)
3-4 bay leaves (I didn't out any since I didn't realize I was out of them)
Salt and pepper 

Directions:
Sauté pork, onions, and garlic for about 5 minutes. Add chicken broth, tomato paste, and patis. Stir to incorporate. Cancel sauté and hit meat. Adjust time to 7 minutes. NPR for 10 min, then QR. Remove lid. Add frozen peas, pimientos, and S&P to season. Stir. 

Now for this part you could let it simmer on sauté at low temp to let the frozen peas to cook through OR pressure cook for 1 minute. I chose the latter just to experiment since this was my first time make this particular dish in the IP. I placed the lid back on and set it for 1 minute on manual. Then did about 8 min NPR and QR. It ended up working out perfectly! Season more if you like to your preference and enjoy over hot rice. MANGAN TAYON (Let's Eat!)!


Wednesday, February 3, 2016

Spaghetti Squash in the Instant Pot

Have you ever tried cooking a spaghetti squash? The standard way is to bake it in the oven or steam it in the microwave.  I only recently discovered spaghetti squash a few months ago and fell in love with it as a rice and noodle replacement. 

Since I had never cooked one before I had to look it up on Pinterest on the best way to do so. I found that the best way to yield longer "noodles" was to slice the squash into about 2-inch slices rather than cutting in half horizontally prior to baking.  Although this was a much better method, it was pretty scary to cut through the tough shell without cutting any fingertips off. Thankfully there were no casualties for myself. 

Now that I have an Instant Pot, I discovered that I could cook a spaghetti squash whole in it. SAY WHAT?! I just had to test it out and worked like a charm. The shell pretty much slid off like a glove. I'm totally now making my squash in the IP. The best part is not having to cut into the squash before hand. 

Here's the easiest recipe ever ;). 

SPAGHETTI SQUASH

Ingredients:
1 whole spaghetti squash (be sure to use one that will fit your pot insert)
1 cup water

Directions:
Add 1 cup water into instant pot. Place trivet into pot and add squash. Close kid, move valve to seal, and press manual button and adjust time to 15-20 minutes depending on size of squash. Do a quick release when done and check for doneness of squash. Cook few minutes longer if middle isn't cooked through. Peel shell, remove seeds, and shred squash. 


Saturday, January 2, 2016

My Christmas Gift

For this past Christmas hubby asked me what I wanted. I thought and thought about it and decided in between an Instant Pot electric pressure cooker or a TRX workout system (well the cheaper but comparable WOSS system) and a high density foam roller. Hubby had asked me this question before Black Friday rolled up and after much thought I decided on an Instant Pot after hearing rave reviews from a few friends who have one.

We already have a stove top pressure cooker but I'm always afraid to use it for fear of it exploding like how in the movie Radio Flyer. We also have a crockpot which I use a lot, but with getting an Instant Pot I can eliminate both gadgets and just have one to do the same work. Plus it's electronic and all I have to do press a few buttons and it does the magic. 

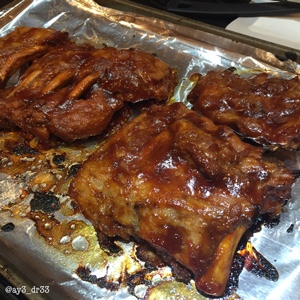
The first meal I ended up cooking in it was a rack of St Louis baby back ribs and it only took 30 minutes to cook! That is the actual cooking time after the pot has come to pressure. It took maybe about 15-20 minutes for the pot to pressurize, then the actual magic started. 

Since this was my very first thing to make in the IP (I will be using this abbreviation to refer to the Instant Pot frequently) I was nervous as heck and didn't want to screw it up. Especially since my hubby was skeptical in getting it for me. I went to the university of YouTube to find an easy enough recipe to follow and I found this recipe by Great Chow and I had all the ingredients on hand. 

After this was done cooking, it literally did fall off the bone. The meat was so tender and flavorful after I did the BBQ sauce glaze in the oven. The only thing I'd change for next time is to use less apple cider vinegar. Otherwise, this was better than when I make it in the oven. 

Here is the link to Great Chow's website for the recipe. Really easy to follow and delicious. 


Banana Mochi Bread

This type of banana bread has become s family favorite over the past few years. It's unlike your regular banana bread recipe since it calls for mochiko flour (sweet rice flour) and it turns out a little more dense because it has almost a mochi like consistency with a perfect amount of sweetness. I found this particular recipe a few years ago on Just a Pinch while Googling for a banana bread recipe. This one intrigued me because of the use of mochiko flour. I'm glad I chose it since it's become a favorite of my boys. So much that my oldest asks me to buy bananas with the intention of eating them but secretly doesn't just so I can make banana mochi bread. Depending on my mood I'll make a batch into loaves, in a cake pan, or as muffins. 
Here is the yummy recipe that I hope you'll enjoy!

BANANA MOCHI BREAD

Ingredients:
1 box (16 oz.) mochiko flour 
1 cup Bisquick
4 tsp. baking soda
1 tsp. salt
2 cup sugar
1 1/2 cup oil
3 tsp vanilla extract 
5 eggs
3 cups very ripe, mashed bananas
1 cup walnuts or macadamia nuts, chopped. (I omit this everytime since certain little people don't like nuts)

Directions:

Combine first six ingredients in a large mixing bowl.  Separately mix oil and vanilla and add to dry ingredients.  Add eggs and mix together until batter is well blended.  Stir in bananas and nuts.  Pour into 4 greased loaf pans (8 1/2 x 4 1/2 inches).  Let batter sit for about 5 minutes before putting it in the oven.  Bake at 350 degrees for 1 hour, do a toothpick test, if it comes out clean, it is done.  Remove from oven onto a wire rack to cool.

*To bake in a 9x13 baking pan, bake for 1 hour.  To bake into muffins, fill muffin tin with cupcake liners, fill tin 3/4 full, and bake for 20 minutes or till brown. Still do a toothpick test to check if it's done. 

Happy New Year 2016!!

Another year has gone by and I always tell myself to keep this blog more active but I don't.  I laugh that the one and only blog post of 2015 was a recipe for kim chee.  

Some good has come out of my dormant blog though. A foodie page on Facebook called Ono Kine Recipes has been sharing a whole bunch of recipes I've posted in past. Mostly it has been the local Hawaiian recipes that have gained exposure on Facebook via Ono Kine Recipes. When a few of my friends contacted me of my blogged recipes being shared, I got excited and started "fan-girling" 😆😊. This was a Facebook page that I was already saving and sharing posts from and now here's my very own blog recipes being shared. It's pretty cool I must say 😉👍🏼. 

On another note regarding everything else going on in my "semi chaotic life". Things have been going well and super busy. Hubby is ever so busy in all things football, big kid is in the second grade and just started taking up Brazillian Jiu-Jitsu, little kid is turning 4 in two weeks and continuing on with speech therapy school, and the fur child is getting old with congestive heart failure and taking a bunch of meds to help prolong his time with us. 

That right there is a HUGE amount of info to delve into since there's been basically LOTS of life info missing from the last time I was actively blogging. So to start off with what I hope is a more active blog this year is my first recipe of 2016 to share in another post which I will post immediately after this post...I promise 😝.  

So here's to a New Year to everyone! We've got 366 days to make the best of it...well 365 now that it's past midnight as of right now for me 😆. Stay tuned for the first recipe 😃. 


Tuesday, February 24, 2015

Homemade Kim Chee

Over a year ago I experimented and made my very first batch of homemade kim chee. Kim chee is a traditional fermented Korean main dish made of vegetables with a variety of seasonings which can taste spicy and a little sour.  Several types of vegtables can be used for kim chee such as Won Bok (Chinese cabbage or Napa cabbage), cucumbers, or daikon (Japanese radish).

I decided to try my hand in making my own kim chee since it's pretty expensive for a small jar that can be eaten in one dinner sitting. I found two recipes online that seemed easy enough to follow and I ended up changing a few things through trial and error. I found two recipes online at umamitopia.com and culinonicles.blogspot.com that I used to reference, but I pretty much used the recipe off of umamitopia instead.

I followed the directions from umamitopia in the first step of brining the cabbage. They had a tsukemono maker to help wilt down the cabbage leaves which is something that I do not have. I have the option of purchasing one from my local Asian grocer but I wasn't about to spend $50+ for such a small item. So I improvised and used a heavy plate to cover the cabbage in a bowl and placed two-5 lbs exercise weights to help weigh it down.

My first batch of kim chee turned out good but I added too much chili powder and it was REALLY spicy for my taste, but overall it turned out pretty good. My second batch turned out even better and with just the right amount of heat. My brother (the chef) even compared it to the Kohala kim chee brand from back home in Hawaii. I've tweaked a few things here and there depending how large of a batch I'm making. The jars I use are ones with a flip open lid that I got from Ikea, but you most certainly can use those Kerr or Ball canning jars.

Here is the recipe with the tweaks that I made for myself.

HOMEMADE KIM CHEE:

Ingredients:
1 medium sized Napa cabbage
2 tbsp. sugar
1 tbsp. kosher salt (I just used regular salt)
2 tbsp. dried chili powder
3 tbsp. kim chee base
2 tbsp. fish sauce
1 tbsp. minced garlic
1 cup shredded carrots
1 cup shredded daikon
1 cup chopped green onions


Directions:
  1. Cut the cabbage in half and cut out the core. Then cut each half in 4 equal sections. Wash the cabbage leave and spin out water in a salad spinner if you have one. If not, just shake out water using a colander.
  2. Place cabbage leaves into the largest bowl that you have.  Add the sugar and salt, mix well without breaking cabbage leaves. Let sit for about 1 hours so the leaves can wilt a bit. 
  3. After it has wilted a little place into large bowl, lay a large but small enough plate to completely cover the cabbage, then place a heavy object onto plate to help weigh it down. In my case they were the two-5 lb. weights. 
  4. Refrigerate for several hours or overnight until you see the water covering the cabbage. When the cabbage is completely covered in water it is ready.
  5. Squeeze out water form the cabbage and place into a bowl. Add the carrots, daikon, and green onion.
  6. In a separate bowl add the chili powder, kim chee base, fish sauce, and garlic. Mix well.
  7. Add the sauce to the vegetables. During this time I use food service gloves to mix all the ingredients by hand. Otherwise a wooden spoon will suffice. If your ingredients look a little dry, add more kim chee base by the tablespoon until they look wet enough.
  8. Once thoroughly mixed place kim chee into glass jars or container. Let it sit at room temperature for 2-3 days. Then refrigerate.

ENJOY!


Sunday, August 24, 2014

Crock Pot Laulau

One of my favorite things to eat from back home is laulau. It is pork wrapped in luau (taro) leaves and which is then traditionally wrapped in ti leaves and steamed till cooked. I could buy some frozen laulau at the Asian store here but it is expensive for such a small serving and the meat is so dry.

I've always wanted to attempt to make my own but I always worried about properly cleaning the fresh luau leaves correctly. If you don't clean the clean the leaves correctly by removing the stem and fibrous part of the leaves, you'll experience an itchy throat when eating the cooked leaves. 

Well I took the chance recently after much convincing from my hubby to just try it and watching a few YouTube videos   The one idea that seemed the easiest to do without me monitoring it while steaming to cook was the crock pot method. 

I pretty much followed this YouTube video with a few minor changes of my own. 


After this was done cooking with the wonderful smell permeating in the air, this came out a WINNAH!  It turned out a lot better than I thought.  Got the seal of approval from the hubby and my brother in law who was over for dinner too.  If only I had a bigger crock put to make more since I was only able to fit about 9 small ones in there.  So with that said here's what I did along with a few changes of my own but I pretty much followed the video.


CROCK POT LAULAU:

Ingredients:
2 lbs. Luau Leaves (Taro Leaves) with the fibrous parts taken out
2 lbs. Pork Butt or Shoulder cut into big chunks
1/2 lbs. Cod (Butterfish)
Hawaiian salt
Shoyu
1/4 c. water
Banana Leaves (Cleaned)

Directions:

1. Thoroughly clean the luau leaves and take out the fibrous parts.


2. Line your crock pot with the cleaned banana leaves with the shiny side facing up.


3. Cut up the pork into big chunks. Mix about a 1/2 tbsp. Hawaiian salt and 1/4 c. shoyu.


4. Grab two leaves into your palm and lay a few pieces of pork and butterfish. Wrap up meat with leaves (view video for better idea).  Repeat with ingredients to fit as much as your crock pot allows (I wasn't able to use all of the pork and fish, so I made a very small batch of kalua pig and just threw the extra fish into the crockpot). Add 1/4 c. water over the laulau


5. Line another layer of banana leaves over the laulau and cover with a sheet of aluminum foil. Cover and cook on low for 8 hours.  The video says you could also cook it on HIGH for 4 hours but according to some of the reviews some people complained the leaves weren't cooked well and their throats itched a little.


6. All the deliciousness right here! My house smelled SO good and couldn't wait to eat this up.


ENJOY!!

Sunday, January 12, 2014

Portuguese Bean Soup


Portuguese Bean Soup isn't something I make too often. One of the key ingredients for this soup calls for some Portuguese sausage which can be found here in Oregon but is very expensive.

We have a stash of frozen Portuguese sausage in our freezer that we brought home from Hawaii on one of last trips and some from when our in laws visited. Although we have a stash we only bring it out to eat on occasion since we try to make that stash last until the next trip home.

I was craving for some Portuguese Bean Soup and what perfect time to have it since it started getting cold and rainy again. I don't follow an actual recipe since this is something I believe my mom taught me when I was a teenager. So this "recipe" below is basically what I normally use and how I make it. There are other recipes that call for macaroni and/or cabbage, but I never put any of that in my soup. 

For those that don't have access to local Hawaii Portuguese sausage you could possibly use smoked sausage or I've seen Mexican linguica in the grocery store as a substitute. Also, to those new to following me I tend to overcook a lot since I grew up learning to cook for a big family. I never make a small batch and it's always in a big stockpot. So you might have to adjust the recipe a bit unless you want to being this as leftovers for a few days ;p. 

PORTUGUESE BEAN SOUP

Ingredients: 
4-6 smoked ham hocks (I used smoked pork shanks this last time since it was actually cheaper and has a lot more meat)
1 stick Portuguese sausage, diced 
2 pkgs. diced ham
2-3 large potatoes cut into small cubes
2-3 large carrots peeled and sliced 
3-4 celery stalks sliced 
1 medium onion diced
4 small cans tomato sauce 
1-2 cans red kidney beans, undrained
Salt & pepper to taste 

Directions:
Boil ham hocks in a stock pot with enough water to cover it. Keep boiling hock meat and adding water until you're able to pierce a fork through the meaty part with ease. Let cool. 

*DO NOT DRAIN OR GET RID OF THE WATER USED FOR BOILING, THAT IS WHERE MAJORITY OF THE SOUP FLAVOR IS. IT'S YOUR SOUP STOCK!*

Remove meat from hock bone and chop up into smaller pieces. Heat up soup stock, add hock meat & bones and remaining ingredients. Boil over medium heat till veggies are cooked through. Add salt and pepper to taste. 

Hope you like this as much as my family and I do. Enjoy!

xoxo,
Adriana