Saturday, January 2, 2016

Banana Mochi Bread

This type of banana bread has become s family favorite over the past few years. It's unlike your regular banana bread recipe since it calls for mochiko flour (sweet rice flour) and it turns out a little more dense because it has almost a mochi like consistency with a perfect amount of sweetness. I found this particular recipe a few years ago on Just a Pinch while Googling for a banana bread recipe. This one intrigued me because of the use of mochiko flour. I'm glad I chose it since it's become a favorite of my boys. So much that my oldest asks me to buy bananas with the intention of eating them but secretly doesn't just so I can make banana mochi bread. Depending on my mood I'll make a batch into loaves, in a cake pan, or as muffins. 
Here is the yummy recipe that I hope you'll enjoy!

BANANA MOCHI BREAD

Ingredients:
1 box (16 oz.) mochiko flour 
1 cup Bisquick
4 tsp. baking soda
1 tsp. salt
2 cup sugar
1 1/2 cup oil
3 tsp vanilla extract 
5 eggs
3 cups very ripe, mashed bananas
1 cup walnuts or macadamia nuts, chopped. (I omit this everytime since certain little people don't like nuts)

Directions:

Combine first six ingredients in a large mixing bowl.  Separately mix oil and vanilla and add to dry ingredients.  Add eggs and mix together until batter is well blended.  Stir in bananas and nuts.  Pour into 4 greased loaf pans (8 1/2 x 4 1/2 inches).  Let batter sit for about 5 minutes before putting it in the oven.  Bake at 350 degrees for 1 hour, do a toothpick test, if it comes out clean, it is done.  Remove from oven onto a wire rack to cool.

*To bake in a 9x13 baking pan, bake for 1 hour.  To bake into muffins, fill muffin tin with cupcake liners, fill tin 3/4 full, and bake for 20 minutes or till brown. Still do a toothpick test to check if it's done. 

Happy New Year 2016!!

Another year has gone by and I always tell myself to keep this blog more active but I don't.  I laugh that the one and only blog post of 2015 was a recipe for kim chee.  

Some good has come out of my dormant blog though. A foodie page on Facebook called Ono Kine Recipes has been sharing a whole bunch of recipes I've posted in past. Mostly it has been the local Hawaiian recipes that have gained exposure on Facebook via Ono Kine Recipes. When a few of my friends contacted me of my blogged recipes being shared, I got excited and started "fan-girling" 😆😊. This was a Facebook page that I was already saving and sharing posts from and now here's my very own blog recipes being shared. It's pretty cool I must say 😉👍🏼. 

On another note regarding everything else going on in my "semi chaotic life". Things have been going well and super busy. Hubby is ever so busy in all things football, big kid is in the second grade and just started taking up Brazillian Jiu-Jitsu, little kid is turning 4 in two weeks and continuing on with speech therapy school, and the fur child is getting old with congestive heart failure and taking a bunch of meds to help prolong his time with us. 

That right there is a HUGE amount of info to delve into since there's been basically LOTS of life info missing from the last time I was actively blogging. So to start off with what I hope is a more active blog this year is my first recipe of 2016 to share in another post which I will post immediately after this post...I promise 😝.  

So here's to a New Year to everyone! We've got 366 days to make the best of it...well 365 now that it's past midnight as of right now for me 😆. Stay tuned for the first recipe 😃. 


Tuesday, February 24, 2015

Homemade Kim Chee

Over a year ago I experimented and made my very first batch of homemade kim chee. Kim chee is a traditional fermented Korean main dish made of vegetables with a variety of seasonings which can taste spicy and a little sour.  Several types of vegtables can be used for kim chee such as Won Bok (Chinese cabbage or Napa cabbage), cucumbers, or daikon (Japanese radish).

I decided to try my hand in making my own kim chee since it's pretty expensive for a small jar that can be eaten in one dinner sitting. I found two recipes online that seemed easy enough to follow and I ended up changing a few things through trial and error. I found two recipes online at umamitopia.com and culinonicles.blogspot.com that I used to reference, but I pretty much used the recipe off of umamitopia instead.

I followed the directions from umamitopia in the first step of brining the cabbage. They had a tsukemono maker to help wilt down the cabbage leaves which is something that I do not have. I have the option of purchasing one from my local Asian grocer but I wasn't about to spend $50+ for such a small item. So I improvised and used a heavy plate to cover the cabbage in a bowl and placed two-5 lbs exercise weights to help weigh it down.

My first batch of kim chee turned out good but I added too much chili powder and it was REALLY spicy for my taste, but overall it turned out pretty good. My second batch turned out even better and with just the right amount of heat. My brother (the chef) even compared it to the Kohala kim chee brand from back home in Hawaii. I've tweaked a few things here and there depending how large of a batch I'm making. The jars I use are ones with a flip open lid that I got from Ikea, but you most certainly can use those Kerr or Ball canning jars.

Here is the recipe with the tweaks that I made for myself.

HOMEMADE KIM CHEE:

Ingredients:
1 medium sized Napa cabbage
2 tbsp. sugar
1 tbsp. kosher salt (I just used regular salt)
2 tbsp. dried chili powder
3 tbsp. kim chee base
2 tbsp. fish sauce
1 tbsp. minced garlic
1 cup shredded carrots
1 cup shredded daikon
1 cup chopped green onions


Directions:
  1. Cut the cabbage in half and cut out the core. Then cut each half in 4 equal sections. Wash the cabbage leave and spin out water in a salad spinner if you have one. If not, just shake out water using a colander.
  2. Place cabbage leaves into the largest bowl that you have.  Add the sugar and salt, mix well without breaking cabbage leaves. Let sit for about 1 hours so the leaves can wilt a bit. 
  3. After it has wilted a little place into large bowl, lay a large but small enough plate to completely cover the cabbage, then place a heavy object onto plate to help weigh it down. In my case they were the two-5 lb. weights. 
  4. Refrigerate for several hours or overnight until you see the water covering the cabbage. When the cabbage is completely covered in water it is ready.
  5. Squeeze out water form the cabbage and place into a bowl. Add the carrots, daikon, and green onion.
  6. In a separate bowl add the chili powder, kim chee base, fish sauce, and garlic. Mix well.
  7. Add the sauce to the vegetables. During this time I use food service gloves to mix all the ingredients by hand. Otherwise a wooden spoon will suffice. If your ingredients look a little dry, add more kim chee base by the tablespoon until they look wet enough.
  8. Once thoroughly mixed place kim chee into glass jars or container. Let it sit at room temperature for 2-3 days. Then refrigerate.

ENJOY!


Sunday, August 24, 2014

Crock Pot Laulau

One of my favorite things to eat from back home is laulau. It is pork wrapped in luau (taro) leaves and which is then traditionally wrapped in ti leaves and steamed till cooked. I could buy some frozen laulau at the Asian store here but it is expensive for such a small serving and the meat is so dry.

I've always wanted to attempt to make my own but I always worried about properly cleaning the fresh luau leaves correctly. If you don't clean the clean the leaves correctly by removing the stem and fibrous part of the leaves, you'll experience an itchy throat when eating the cooked leaves. 

Well I took the chance recently after much convincing from my hubby to just try it and watching a few YouTube videos   The one idea that seemed the easiest to do without me monitoring it while steaming to cook was the crock pot method. 

I pretty much followed this YouTube video with a few minor changes of my own. 


After this was done cooking with the wonderful smell permeating in the air, this came out a WINNAH!  It turned out a lot better than I thought.  Got the seal of approval from the hubby and my brother in law who was over for dinner too.  If only I had a bigger crock put to make more since I was only able to fit about 9 small ones in there.  So with that said here's what I did along with a few changes of my own but I pretty much followed the video.


CROCK POT LAULAU:

Ingredients:
2 lbs. Luau Leaves (Taro Leaves) with the fibrous parts taken out
2 lbs. Pork Butt or Shoulder cut into big chunks
1/2 lbs. Cod (Butterfish)
Hawaiian salt
Shoyu
1/4 c. water
Banana Leaves (Cleaned)

Directions:

1. Thoroughly clean the luau leaves and take out the fibrous parts.


2. Line your crock pot with the cleaned banana leaves with the shiny side facing up.


3. Cut up the pork into big chunks. Mix about a 1/2 tbsp. Hawaiian salt and 1/4 c. shoyu.


4. Grab two leaves into your palm and lay a few pieces of pork and butterfish. Wrap up meat with leaves (view video for better idea).  Repeat with ingredients to fit as much as your crock pot allows (I wasn't able to use all of the pork and fish, so I made a very small batch of kalua pig and just threw the extra fish into the crockpot). Add 1/4 c. water over the laulau


5. Line another layer of banana leaves over the laulau and cover with a sheet of aluminum foil. Cover and cook on low for 8 hours.  The video says you could also cook it on HIGH for 4 hours but according to some of the reviews some people complained the leaves weren't cooked well and their throats itched a little.


6. All the deliciousness right here! My house smelled SO good and couldn't wait to eat this up.


ENJOY!!

Sunday, January 12, 2014

Portuguese Bean Soup


Portuguese Bean Soup isn't something I make too often. One of the key ingredients for this soup calls for some Portuguese sausage which can be found here in Oregon but is very expensive.

We have a stash of frozen Portuguese sausage in our freezer that we brought home from Hawaii on one of last trips and some from when our in laws visited. Although we have a stash we only bring it out to eat on occasion since we try to make that stash last until the next trip home.

I was craving for some Portuguese Bean Soup and what perfect time to have it since it started getting cold and rainy again. I don't follow an actual recipe since this is something I believe my mom taught me when I was a teenager. So this "recipe" below is basically what I normally use and how I make it. There are other recipes that call for macaroni and/or cabbage, but I never put any of that in my soup. 

For those that don't have access to local Hawaii Portuguese sausage you could possibly use smoked sausage or I've seen Mexican linguica in the grocery store as a substitute. Also, to those new to following me I tend to overcook a lot since I grew up learning to cook for a big family. I never make a small batch and it's always in a big stockpot. So you might have to adjust the recipe a bit unless you want to being this as leftovers for a few days ;p. 

PORTUGUESE BEAN SOUP

Ingredients: 
4-6 smoked ham hocks (I used smoked pork shanks this last time since it was actually cheaper and has a lot more meat)
1 stick Portuguese sausage, diced 
2 pkgs. diced ham
2-3 large potatoes cut into small cubes
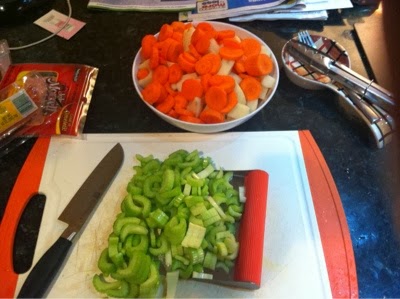
2-3 large carrots peeled and sliced 
3-4 celery stalks sliced 
1 medium onion diced
4 small cans tomato sauce 
1-2 cans red kidney beans, undrained
Salt & pepper to taste 

Directions:
Boil ham hocks in a stock pot with enough water to cover it. Keep boiling hock meat and adding water until you're able to pierce a fork through the meaty part with ease. Let cool. 

*DO NOT DRAIN OR GET RID OF THE WATER USED FOR BOILING, THAT IS WHERE MAJORITY OF THE SOUP FLAVOR IS. IT'S YOUR SOUP STOCK!*

Remove meat from hock bone and chop up into smaller pieces. Heat up soup stock, add hock meat & bones and remaining ingredients. Boil over medium heat till veggies are cooked through. Add salt and pepper to taste. 

Hope you like this as much as my family and I do. Enjoy!

xoxo,
Adriana


Wednesday, January 8, 2014

80's Style NYE Party

This past NYE we hosted an 80's themed party and dressing up the part was required. Everyone's costume could be anything 80's related so sky was the limit and this would fare for a fun and interesting evening. Since everyone would be coming in costume we decided to also set up a photo booth with a few props.

For our family of four it was pretty easy to decide on what we would wear except for my hubby who kept changing his mind on his costume. With the holiday season being so busy we didn't have enough time to get too elaborate on our costumes and I wanted to use things that we already have or could find easily at the Goodwill or elsewhere for cheap.

Our two boys were totally easy to dress up, they ended up being Run DMC. All they needed were a pair of black track pants, black shirts, fedora hats, and gold necklaces.  Real simple! The lil kid already had a hand me down Run DMC t-shirt from his big brother, so that was perfect.  I also was actually able to find the lil kid a black Adidas track jacket at the Goodwill for $3.99 :) and fedora hats from The Dollar Tree.  For the gold necklaces they just wore some gold beaded NYE necklaces that I got for party props.


For myself I pretty much had an idea on what I was going to wear but the decision on how to coordinate the outfit was the more daunting task.  After searching on Pinterest and googling ideas I got set on some kind of Jazzercise'ish/Let's Get Physical outfit. When I found the lil kid's jacket at Goodwill, I also found for myself a pair of bright pink and black jogging shorts that were still brand new with tags on salvaged item from Target for $3.99. I already had on hand at home a pair of black tights, an old t-shirt that I cut up, and a white tube top.  All I needed to complete my outfit was a pair of leg warmers and gloves. I didn't realize how expensive those things were! I knew there had to be a way to DIY it myself on the cheap. 

I remember on Pinterest that leg warmers would be easy to make by using the sleeves of old sweaters. So I went back to Goodwill to hunt for some cheap sweaters on color tagged special but that was a bust until I saw something at the end of the aisle.  There were pairs of cheap colorful socks and I also remembered on Pinterest seeing how to make baby legs from socks...also a friend of mine has done so herself. I examined the socks and figured that they were stretchy and long enough for me so I could experiment. 


 Based on tutorials when making baby legs you'd have to cut right where the heel part is and that would be a perfect length for a baby after sewing up a seam. However, I needed that extra material to fit for an adult. So I just snipped off the toe area and sewed a seam. Then since the heel part tuckered out, I snipped a little bit off so it was sticking out so much and sewed the hole right back up.  Then there you have it a pair of cheap DIY adult leg warmers ;).

Now for my gloves I found a similar matching in color pair of socks at the dollar store. I snipped a little bit of the toe part off, sewn a seam, and sewn finger holes. Since I was pressed for time I just snipped a little hole for the thumb parts and put some anti fraying liquid to keep it from unraveling. Threw on my outfit, did a half up pony tail to the side with a cotton headband I used as a "scrunchie", slapped on some makeup, and used some of the NYE beaded necklaces.  Outfit complete!


Now for my hubby he kept going back and forth on his outfit.  He had the bright idea for us to go as American Gladiators or as Prince and Apollonia in the movie Purple Rain.  If we had time I so could make that happen but there was no way I'd be able to pull that off in the few days had to prepare.  Then I came up with the idea of him going as Bob Ross from that PBS painting show, he had the outfit all he needed was to borrow an Afro wig. Another option was to go as Tom Cruise in Risky Business, but hubby doesn't own tighty whities and I wasn't about to go buy a pack just for the party.  Then I came up with the wonderful idea of him going as Cheech from the movie Up in Smoke ^_^!

I didn't have the yellow tank top/tee, red beanie, or red suspenders so I had to improvise a little.  I could've sworn that my hubby had a black vest but it must've gotten lost in our moving shuffle from the year before. So I ended up doing a DIY vest of my own instead.  I had an old black t-shirt and just  cut off the sleeves and shaped the front to look like a vest. Since I was making photo booth props that consisted of mustaches there was one perfect to be a Cheech mustache. I traced the handle bar mustache onto some black felt and added double sided tape for hubby to wear. Then hubby threw on a pair of khaki pants, a white ribbed tank top, the DIY vest, the mustache, and a black beanie. Hubby normally shaves his head so he was supposed to wear my old mullet wig under his beanie but he opted out from doing so. It wasn't necessary since his costume was still easily identifiable even if I didn't have time to DIY a huge fake "joint" ;)-.


We had Bruce Springsteen, Ghostbusters, Marty McFly, a few more 80's exercisers, Sloth from The Goonies, Mr. T, 80's teeny boppers, Madonna,and Punky Brewster join the party.  The night was filled with lots of food even if it was just a pupu potluck, laughs, and fun with the photobooth. When it was time to countdown to the new year, we all gathered outside and did four countdowns since we kept going by people's different clocks times. LOL! Nonetheless, we Chee Huu'd a few times and rang in the new year with everyone.


The party turned out to be a success and a few of us talked about doing another themed party in a few months. I think we settled on a superhero theme for the next one and I've already got ideas for our family costumes. I'm already thinking up ideas on how to improve the backdrop for the next photo booth.

HAPPY NEW YEAR 2014 EVERYONE!

xoxo,
Adriana


Wednesday, January 1, 2014

Happy New Year...2014 Here We Go!

Happy New Year 2014 to everyone!

Dusting off this blog once again. I'm so terrible trying to keep this thing going. I can blame all the everyday life craziness that gets in the way of being active on here. So with that said here are just a few  resolutions that I want to improve on within this year. 

1. Blog at least 1x a week.

2. The usual weight loss goal. I did so good last year that I'm able to wear sizes that I haven't seen in almost 14 years. Just got so "lazy" in the last few months that I NEED to get back on it. 

3. Learn how to use our DSLR camera better. I rely on my hubby too much to take the pictures with it. I know some functions but not to it's full potential. 

4. With said above, take more pictures of the boys. We've encountered the "second child syndrome" and don't nearly have as much pictures of our second son as we do our oldest son. I want to be able to pick up the real camera more and not rely on using my phone as much.

5. We've lived in our new home for a little over a year. It's time that I really start tackling and getting this house more organized. There are things still in boxes that haven't found a permanent spot. This where my organizational Pinterest fantasies hopefully can come true >_<. 

6. In addition to the above, I need to start decorating our home more. Bare walls galore! Got all the picture frame & art work supplies sitting there, just have to make my other Pinterest decorating fantasies come to life here too. 

These are what have been lingering on my mind on what I want to try to improve on. Now let's see which of these six will be will make it till the end of the year. 

Here's to the next 365 days of 2014!