Tuesday, September 13, 2011

Rah Rah Ah Ah Ah...

This post isn't about Lady Gaga, but making my own homemade pom poms. Heh, that part of Bad Romance just popped into my mind and gave me the idea for the post title.

Anyway, it's college football season and we were lucky enough to catch the season opener game for the University of Hawaii on our recent trip home. Also, this weekend we get to watch another UH Warrior football game in Las Vegas. Whoot Whoot!! We got a bunch of Warrior gear and we're all good to go.

However, I felt we were missing something and after watching another game on tv it dawned on me that it was pom poms. I was watching the crowd in this particular game and they were shaking around pom poms in the school colors. Then it gave me the idea to make on my own so I went to the best tutorial site...YouTube.

I found some that were made with crepe paper and they looked pretty lame. Until I found a tutorial that really caught my eye and seemed really easy to follow. I can thank Pinellas County HIPPY Helps for this tutorial. I'm currently writing up this post on my phone so I'll have to update with the actual tutorial later.

For this pom pom creation it only cost me less than $5 to make and I just used three materials. Here's the how to with a minor addition.

Homemade Pom Poms

Materials:
Plastic tablecovers (In any color you like.)
Scissors
Electoral tape


Directions:
Open up the tablecloth completely, fold in half, and cut in half. Keep cutting the tablecloth in half until you get squares around the size of 12"x12" or 14"x14" depending on the original size of the tablecloth. When done cutting they would look like this below.


Next start layering your cut pieces in alternating colors using a total of 20 sheets. I used clothespins to help hold the sheets together so they don't slip around when cutting.


Once the sheets are clipped together start cutting about inch wide strips one half of the sheet stopping about a half inch toward the center. One half will look like this below.


Then continue to do the same on the other half.


Next take off one of the clothespins and start gathering the uncut center. I gathered the center in a fan like hold till I reached the end.


Once gathered, wrap the electrical tape tightly around the center about five times.


Lastly, start fluffing each piece on both sides. Separate each piece gently to alternating sides. Once done the pom pom will be full and you won't even see the electric taped center. Here's how they will look.


I'm going to make another set using the other UH colors. Can't wait to bring these to the game this weekend.

GO WARRIORS!!

Here's the tutorial video that you all can watch.  Happy crafting!


Wednesday, August 31, 2011

Where the Heck....

Have I been?

Geez, I haven't posted anything in here since May!  It's been a ghost town on my blog since then.  Well I'm alive and well and a whole lot has happened since I last posted.  I've been meaning to share some news that is quite exciting for us but haven't had the time to post it. 

The BIG announcement is that Ancheta & Co. is EXPANDING!!  Baby #2 is on his/her way this coming February 2012.  I'm so far 17 weeks along and we get to find out the baby's sex in about three weeks.  The Lil Booger is excited that he gets to be a big brother and can't wait to help out with the new baby. 


Finding out that we're expecting Baby #2 happened a day before our 4-year wedding anniversary and it was a great present to the both of us.  Now I can't wait to have enough energy and time to start making some baby craft items.  We're home in Hawaii right now so I've already gotten some really nice Hawaiian print material and before we left Oregon I scored some cheap diaper cloths. 

Our summer has been pretty busy with the Lil Booger in some sports camps offered through our city and parks recreation.  Adding with me feeling completely exhausted and finally experiencing "any time of the day" sickness during my first trimester.  We've had a fun filled summer I must say though with camping, sports, days at the park, and now to end it with a trip home to Hawaii.

That's pretty much why I've been M.I.A on my blog.  Now that I've gotten most of my energy back and not taking 4-hour naps in the afternoons anymore, I should be able to blog a little more now. LOL! 

So I'll see you all soon.  Here's a pic to end the blog with that I took the other day.  I was telling my hubby that I took a similar pic like this when the Lil Booger was six months old on our first trip home with him.  Just to think in a year we could have Baby #2 doing the same post ^_^.


Saturday, May 21, 2011

I'm Getting Fancier...

I made a batch of red velvet cake balls for hubby's bosses at work and with this batch I wanted to play around with a little decorating.  Nothing totally fancy but just with some candy drizzling. 

I first tried doing the drizzling with a melting squeeze bottle but I think I got a little impatient with the candy melting that I clogged the tip.  Since I didn't have a small enough cake decorator tip I sort of went the poor man's route and used a Ziploc bag.  I just filled it up with chocolate, sealed it up, and snipped a tiny whole in the corner of the bag.  Heh, it worked for the purpose and the cake balls turned out alright.  I just need to make a mental note to find a new decorator tip for this kind of decorating purposes.

Guess their looks didn't matter since I was told they tasted so good anyway ^_^.  Here's how they looked.


Special Order

Colored Balls...

So with this whole phenom of Bakerella's Cake Balls I jumped on the wagon in making these now. 

The thing I didn't mention in my previous post when I first made them is that I found a WAY cheaper way to get candy melts.  Rather than using pre-packaged Wilton brand candy melts that you can find already colored, I actually found chocolate and vanilla candy melts in the bulk foods section of my local grocery store at Winco.  The Wilton candy melts come in bags of 14 oz. at around $2.99 regular price.  Whereas, in the bulk bins I got my candy melts for $2.38/lb! Even though I would have to use oil based dye to color the white melts it still cheaper than buying the melts pre-packaged and I can deal with the coloring part. 

If you have a bulk foods section in your local grocery store go and look if you can find the candy melts.  I've been shopping at the grocery store for the past 10 years and have only really discovered it in the recent months.  I don't know why I never thought of buying most of my grocery items in that section, it would have helped me save some money in the past.

With that said this past Easter I made some Devil's Food cake balls just to play around with flavor.  With this batch I ended up using vanilla flavored candy melts and used oil based dye to color them baby blue and lavender. 


I had to play around with the dyes a bit to get the color I wanted.  I first started out with the blue coloring and used a toothpick dipped into the dye and let it drip into the melted chocolate.  After a few tries I got the color I desired.  With this batch of cake balls I think I made about 80, so I colored half of it blue and the other half lavendar.  When the first batch was done I still had some blue coating left, so I just added more candy melts and added red dye till I reached the lavendar shade I wanted.

After this batch was done and taste test commenced.  I got a thumbs up from my Lil Booger and friends!  Although they still preferred the red velvet cake instead LOL.  It was good experimentation for me and try to get the cake balls coated nicer. 

Here's how they turned out and a few pics of my supplies.

Vanilla Candy Melts


Oil Based Candy Colors


Vanilla Melts Colored Lavender


Light Blue Colored Cake Balls


Lavender Colored Cake Balls


Monday, May 16, 2011

Spring Cleaning...

Is it still technically Spring?  I can't really tell while living in the Great Northwest since it's still raining LOL. 

Nonetheless, I've gotten the sudden urge to do some spring cleaning and try to re-organize our house.  The first plan off attack was our kitchen pantry.  I usually end up cleaning it up and in no time it looks like a bomb went off in there.  I figured maybe getting pantry stackable shelves will help out the problem with the canned goods piling on each other and getting bigger baskets or containers for our snacks and such.

So the first place I had to check out was IKEA for some organizers on the cheap.  I so LOVE Ikea and wish I could furnish our whole house with their stuff.  I knew they would have what I needed which where the stackable shelves.  I had already checked Target for those but they were a little more rinky dink than I imagined and costing $7 or more each item.  So when I seen the Rationell Variera shelf insert for $5.99, that had me sold. 

We took a quick trip to Ikea yesterday and I was on a mission to JUST get the shelves and that's it.  Yeah, that sort of didn't happen, I got two glass vases for under $2/each and 3 rubber spatulas for $0.29 in addition to the shelves. I was though in Ikea for under an hour on a Saturday afternoon, you have to give me that LOL.

Then on Sunday I hit up Home Depot and Target to search for storage bins/containers to better contain other things that are thrown into the pantry.  When I finally got home I spent the last three hours or so purging out old food and what nots in there that I had used 3/10 gallon sized garbage bags that were filled to the opening of the bags.

After all that work, I must say I'm quite satisfied how it turned out.  The only thing I forgot to do was clean out the very top shelf which is pretty minor.  Now that this part of spring cleaning is over, on to other parts of the house.  Here's my BEFORE/AFTER pics of my cleaning escapade.

BEFORE:


AFTER:


Saturday, April 9, 2011

Pretty Cherry Blossoms & Sunshine...

Today was such a nice and sunny day that all the Cherry Blossom trees I seen while driving around looked so pretty.  I like this time of season when all the spring flowers start to bloom.  My flower bed in the backyard of daffodils and tulips are blossoming. 

I keep bugging my hubby to plant a cherry blossom tree but he doesn't want to since the flowers make a big mess when they fall.  Makes a good point there since I don't want to be the one that cleans it up LOL.  It's SO pretty though.  I guess I'll settle for admiring cherry blossoms from afar like I did today.  I took a picture of a tree today but it's not the greatest since it was taken from my phone.  Hopefully we get another sunny day to take some real pics, but here's the beauty I saw today :o).


I WON!!

I totally forgot I had entered a giveaway at the blog site Rad Linc Crafts nearly a month ago since March was National Craft Month.  The giveaway was for a book on how to create nylon flowers and a small kit to get me started. 

I absolutely forgot that I even entered this giveaway and only remembered when I had seen a comment posted on my DIY Nail Polish post made be Fe at Rad Linc Crafts telling me that I won.  Again, sorry Fe that I didn't get in touch with you any sooner.

I am so excited that I won since I've been wanting to try my hand in making nylon flowers since I've already made fabric ones already.  I don't have a picture sample of my own to show you how a nylon flower looks like but you can check out one of Rad Linc Crafts' tutorials on "Making Nylon Flowers, Part 3: Making Plumerias" to get an idea.

In addition to checking out that tutorial, check out her entire blog.  She's got other great craft tutorials and recipes as well.

I can't wait to receive my giveaway prize and start making some nylon flowers.  I'll of course be sure to write up a blog when I do ;o).

Tuesday, April 5, 2011

It's T-Shirt Time! Criss Cross Technique...

After doing the weaving technique I wanted to try out other ideas, so I went back to YouTube to find other cool t-shirt cutting techniques.

The one idea that caught my eye was by Salinabear and she has several other tutorial vids that are just as cool.  She did this really cool criss cross technique that intrigued me and I had never seen before.  It looked a little complicated so I had to use an old t-shirt of my hubby's as a guinea pig before I even started on the actual shirt that I was interested in cutting up. 

This technique requires you to cut tiny holes into the shirt for weaving the strips into.  I ran into a little problem with that since I had a hard time finding where I actually cut the holes.  I should actually clarify that the video tutorial says to cut tiny holes but I ended up just poking holes with my scissors instead since I wanted to make sure that when I weaved the strips through they would stay put and not fall out.

Anyway if you follow my technique of making holes, I HIGHLY recommend that you mark your holes with tailor's chalk on dark material or disappearing water soluble pen on light material.  I ended up missing a hole when I practiced on my guinea pig shirt.

Here are some pics of my cutting process along with the actual tutorial vid.

Cut back into strips and stretch out.


Separate your strips to be tied in 4 different sections.


The final project.


I followed just the criss cross cutting technique and adjusted the shirt to fit me better since it's one of my hubby's old XL t-shirts.  Here is the video tutorial by Salinabear and be sure to check out her other tutorials as well. 

Happy Cutting!

It's T-Shirt Time! Weaving Technique...

I wish I never gave away a bunch of old tees that I had so I could experiment with the cool art of t-shirt cutting.  So for now I'm using my hubby's old tees for practice and just adjust them to fit me. 

I started my hand in t-shirt cutting a few months ago when I wanted to match my son's Plex Halloween costume.  I just the weaving technique on the back, cut out the neckline, and tied colored ribbon to scrunch up the sleeves. This turned out pretty good for my first time and this is how it turned out.


I later did more t-shirt cutting for myself, a friend, and her daughter using the same technique when we went to a Yo Gabba Gabba concert.  I didn't have enough time to experiment with different styles so I just did the same weaving technique.  I ended up weaving the back of my t-shirt three times since it was too loose.  Here's how our t-shirts turned out.

Danni's Tee


Suelynne's Tee


My Tee


I'd give you the rundown tutorial but I'd totally screw up on writing it correctly.  So rather than confuse the heck out of you here's the YouTube video by MakeupByRisa that I used to get the idea of just the weaving technique.  Everything else I did to my tee was just by going with the flow on how to make it cute. 

Hope you try this out and you rock some cool tees!


Sunday, April 3, 2011

Trifle, Sex in a Pan, Orgasm Cake...

However you want to call it.  I've only known this dessert to be called Trifle when I first learned how to make this over 15 years ago in high school.  It's so indulgently yummy and chocolaty I can see why it can be called "Sex in a Pan" or an "Orgasm Cake" since it's better than sex or so I've been told LOL.

It's really easy to make and I usually layer this dessert neatly into a glass trifle dish bowl.  However, since I made this last night to take over to a BBQ I just used a plain ol' aluminum pan and made one layer of each ingredient.

Here's the how to:

CHOCOLATE TRIFLE
Ingredients:
1 box of devil's food cake mix
1 box of chocolate instant pudding (I used the bigger one, not sure what the size is exactly)
1 big tub of Cool Whip
4 Skor candy bars

Directions:
Bake cake according to box directions.  Prepare pudding according to package directions.  Let Cool Whip thaw out while cake is baking.  Chop up Skor candy bar into small pieces.  Once the cake is done baking and cooled down, crumble into a layer in a trifle bowl.  Layer with half of chocolate pudding, half of Cool Whip, and candy.  Repeat layer one more time with remaining ingredients.

This is how it would look like in a trifle bowl and one layered in an aluminum pan.


Cake Balls!

I have been wanting to make Cake Balls for forever but never had a reason to make them.  Like I really had an excurse not to anyway, they're some kind of dessert!  If you're not familiar on what Cake Balls are, they're essentially chocolate covered cake balls kind of like a truffle. 

I've been following the site Bakerella that showcases the Cake Balls along with other yummy looking treats.  She provides the how-to's to duplicate her yummy creations and they look pretty easy.  So since my son's third birthday is coming up I was thinking of making these cake balls as treats for the young ones but more so for the adults. 

I followed Bakerella's recipe for the Red Velvet Cake Ball's and here's my process on how they turned out.

Ready to bake the cake.


Cake is done baking.


Crumble the cake.


Add a can of whipped creamcheese frosting.

 
Mix the frosting into the crumbled cake.


Shape into about 1.25 inch balls.


 Melt chocolate. Here I used an electric candy melter/warmer.


Melted chocolate ready in about 5 minutes.


Dip a cake ball into chocolate, tapping off any excess.


Lay on a cookie sheet lined with wax paper.  Allow chocolate to harden.


Mmmm....Yummy Red Velvet Cake Balls!


Thursday, March 17, 2011

DIY Nail Polish

I subscribe to the craft website Craft Gossip via Facebook and they post all kinds of daily craft projects done by other crafters. One craft project that caught my eye recently was DIY Nail Polish. The site featured for that project was The Lifestyle Lounge.

The Lifestyle Lounge featured two how-to's but I chose to try out the first option which seemed the easiest to do. After getting my supplies I set out to try my little experiment out earlier today.

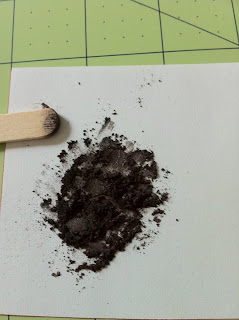
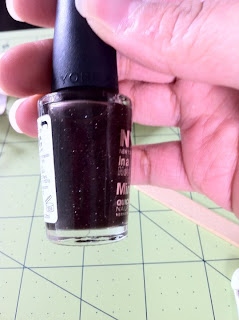
Here's the supply list and directions from The Lifestyle Lounge.  I just got a cheap $1 eyeshadow quad and a $2 bottle of clear polish from Target since I didn't want spend too much on this and not have it work.  This actually did work with cheap supplies and I can't wait to make more.  The bottle of DIY nail polish in the end cost me about $3....not too shabby ;o).

HOMEMADE NAIL POLISH
Materials Required:
Clear Nail Polish
Colored Eye Shadow/ Pigment Makeup
 Nail Polish Remover
Fine Glitter Dust (optional)
Small Funnel
Scrap of Paper
Plastic Baggie


Procedure:
Open up the bottle of clear nail polish and place the funnel end into the bottle.

Block the hole of the funnel by placing a small scrap of paper at the bottom.


Place some eye shadow in a sealed plastic bag.

Gently press the eye shadow and crush it till you get a lump-free, powdery consistency.


Transfer the powdered eye shadow or pigment makeup into the funnel.

If you desire, you can add a very small amount of fine glitter to the funnel mixture.

Carefully mix the fine glitter and eye shadow/ pigment makeup before you remove the scrap of paper.


Remove the scrap of paper and allow the mixture to enter the bottle.

Remove the funnel from the bottle and replace the cap on the clear nail polish.

Shake the bottle well for about 2 minutes.

You can add more eye shadow/ pigment makeup or glitter in case the resultant color is not up to your liking.

In case your nail polish gets thick or lumpy, add a few drops of nail polish remover and shake for one minute to thin the nail polish.